![logo_green background.png]](https://support.onyo.de/hs-fs/hubfs/logo_green%20background.png?height=40&name=logo_green%20background.png)
With HRIS Sync, onyo automatically imports your employees from Personio – every hour, with no manual import. This guide walks you through the setup step by step.
Prerequisite: In Personio you need the access rights for the Marketplace integration and the API (under Einstellungen → Mitarbeiterrollen → Zugriffsrechte → Konto-Konfiguration) – a full administrator role is not required.
Already connected onyo to Personio? Then do not create a new integration – just reset the credentials, see Reset the credentials at the end of this article.
Note: the screenshots show the German Personio and onyo interfaces; the German labels are quoted alongside the English text.
Step 1: In onyo, set the provider to Personio
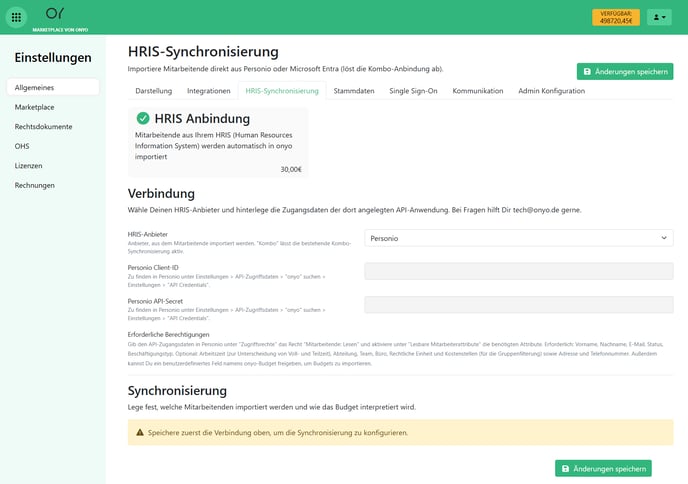
In onyo, open the HRIS Sync page (Settings → General → HRIS Sync) and set the HRIS provider to Personio.
Step 2: In Personio, open the onyo Marketplace listing
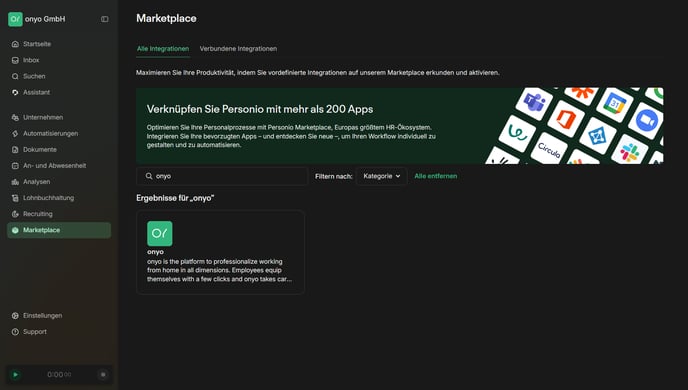
In Personio, open the Marketplace and search for "onyo". Click the onyo tile in the search results.
Step 3: Check the permissions
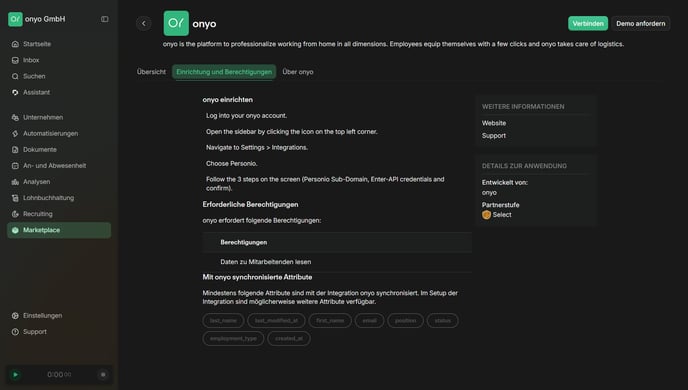
Open the onyo integration. Under "Einrichtung und Berechtigungen" (setup and permissions) you can see that onyo only needs the single permission "Daten zu Mitarbeitenden lesen" (read employee data). You do not need to select anything manually here – the permission is granted automatically when you connect.
Step 4: Connect and generate new credentials
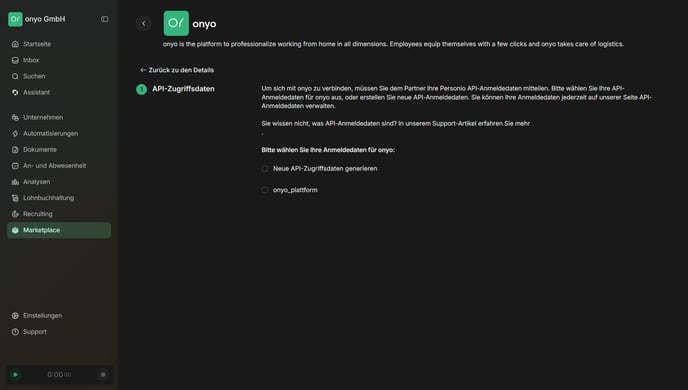
Click "Verbinden" (connect) in the top right. In the next step choose "Neue API-Zugriffsdaten generieren" (generate new API credentials) and confirm.
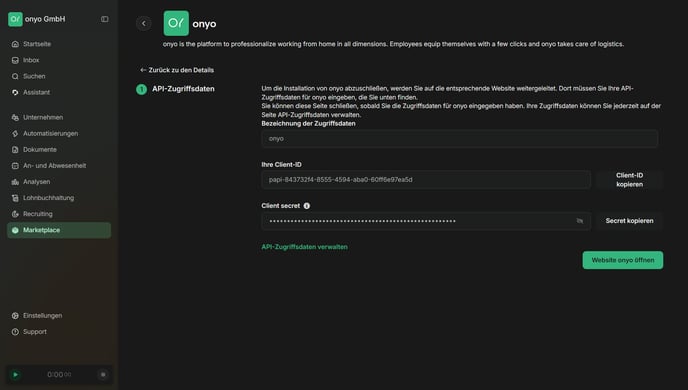
Step 5: Copy the Client-ID and secret
Personio now generates the credentials: the Client-ID and the Client secret. Keep this window open until both values are entered in onyo (the secret is only shown once), and copy them over one at a time – first the Client-ID, then the secret (step 6).
Step 6: Enter the credentials in onyo
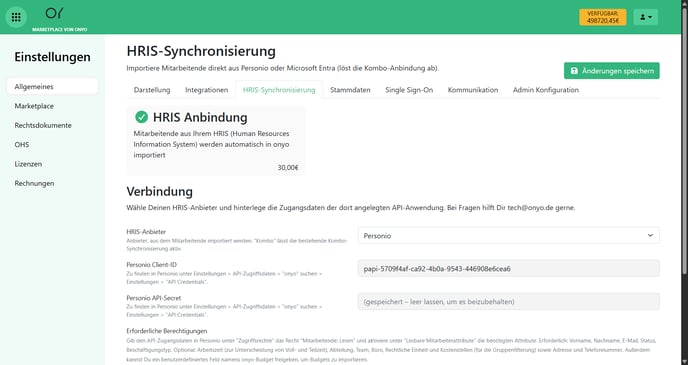
Switch back to onyo and, under "Connect", paste the Client-ID into the "Personio client ID" field and the secret into the "Personio API-Secret" field. Then click "Save changes".
Step 7: Configure the sync
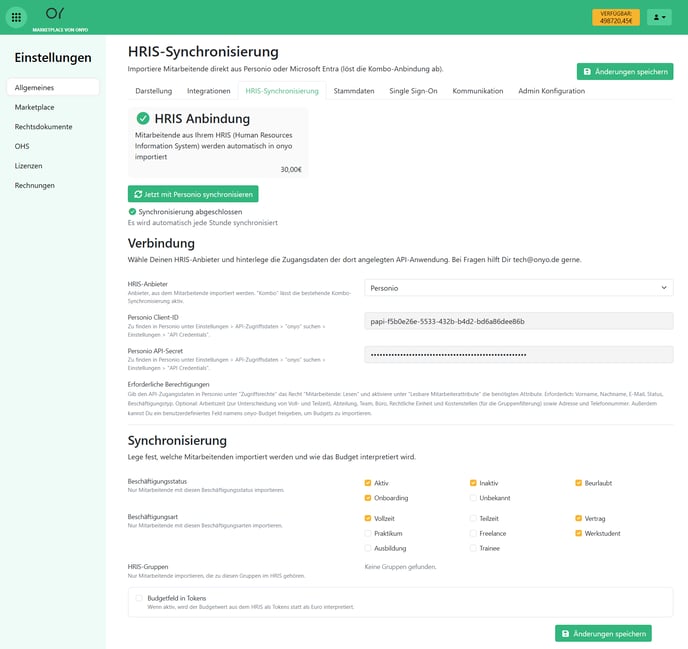
The sync settings only appear after the connection has been saved (the group list is loaded live from Personio). Define which employees are imported:
- Employment status – only import employees with these statuses.
- Employment type – only import employees with these employment types.
- HRIS groups – leave empty to import all current and future groups.
- Budget field in tokens – irrelevant for most companies and only relevant if you use virtual tokens instead of euros in onyo. Enable it only in that case, and only if the budget in Personio is also maintained in tokens.
Important: If you set several filters, employees must match all of them to be imported. For example, if you select certain employment statuses and certain employment types, someone is only imported when both the status and the type match (and, if groups are selected, the person belongs to one of them). Within a single filter, one match is enough – e.g. one of the selected statuses.
Step 8: Start the first sync
Click "Synchronize now with Personio" to start the first import. After that, onyo syncs automatically every hour. A green "Sync completed" confirms that everything works.
All done :) From now on onyo keeps your employees in sync with Personio automatically: new people are created in onyo, changes (e.g. name or address) are applied, and people who no longer match your criteria or were deleted in Personio are deactivated – every hour and with no manual import. Should you have any questions or problems, feel free to contact us via the contact form at any time.
Already connected? Reset the credentials
If you have already set up the onyo integration in Personio, do not create a new integration. Instead, reset the existing credentials:
- In Personio, go to Einstellungen → "API-Zugriffsdaten" (settings → API credentials) and select "onyo".
- Open the "API credentials" tab and click "Client-ID und API-Secret zurücksetzen" (reset Client-ID and API secret), then confirm.
- Enter the new Client-ID and the new API secret in onyo (steps 6–8 above).